

Mediacurrent created the Rain Install Profile to build fast, consistent Drupal websites and improve the editorial experience. Rain expedites website creation, configuration, and deployment.
In our previous article, we walked through each feature of the Rain Install Profile with tips on how to use and configure each feature. In today’s tutorial, we zoom in on some technical aspects that backend developers will need to understand to properly develop against the Rain distribution.
Have a question or comment? Hit me up at @drupalninja
Post-install configuration
The last article, What’s New in Rain 3.0, gives some basic instructions on how to install Rain successfully. The Drupal project template repository also gives additional details on how to fully set up the entire project, including the local environment. Here we will cover what developers should do next once they have successfully installed Rain for the first time.
Creating a sub-profile
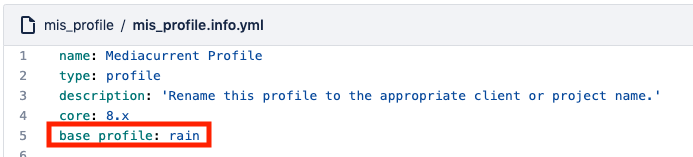
By default, the Mediacurrent Drupal project template includes a core patch that allows for profiles to inherit features and configuration from a parent profile. This follows a similar pattern to base themes and sub-themes in Drupal. The project template also bundles with it a sample profile (“mis_profile”) to demonstrate how to set up sub-profiles. The screenshot below illustrates the new yml syntax that will enable the “base profile” inheritance.
Do I need to create a custom install?
You might ask - Why mess with a custom install profile at all? You certainly don’t have to. You could simply run mis_profile or the base Rain profile as-is and then start making your customizations. That said, many organizations take the approach of creating a custom install profile for each project. This can be handy for encapsulating configuration, install functions and other aspects related to the project. Mediacurrent takes this approach, and we highly recommend other organizations implementing Drupal applications do the same.
To get started, simply rename the “mis_profile” folder to your project name, then search and replace any instances of the “mis_profile” text string in your project. Once this is done you can remove the reference to mis_profile in composer.json as it will no longer be needed. From that point on, when you run build.sh your config.yml will instruct the installer to use your custom profile.

Files included in sample mis_profile
Exporting configuration
The easiest way to get started with Rain is to run the ./scripts/build.sh command once your initial sub-profile is set up from the previous step. The base Rain installation will configure common modules covered in the Rain Admin and Authors Overview article. All of the content features will be left disabled initially but can easily be enabled through Drush or the “Admin Modules” page. Once you have the initial configuration set, it’s generally best practice to export that configuration to a version-controlled folder. In your local settings file you should have a line that is commented out by default that looks like the following:
# $config_directories['sync'] = $app_root . '/profiles/mis_profile/config/sync';
The line should have the name of your profile. Once you uncomment out that line you can run drush cex -y using your local site alias. This will export your configuration to your install profile folder (also considered best practice but not required). Now, every time you execute ./scripts/build.sh Drupal will create the site using your exported configuration. We love this approach because it ensures project developers are sharing the same configuration and it pairs nicely with automated tests.

Example sync folder from Gatsby Drupal 8 demo
Customizing Content
The content features that ship with Rain can be easily customized. Custom paragraph types are integrated with the Rain base theme (“rain_theme”) which means that changes to Paragraphs often require updates to Twig templates as well. The Rain theme is optional but adds the benefit of pre-configuring Paragraphs to map to components provided in the theme’s style guide. We will cover theming with Rain more in-depth in the next article.
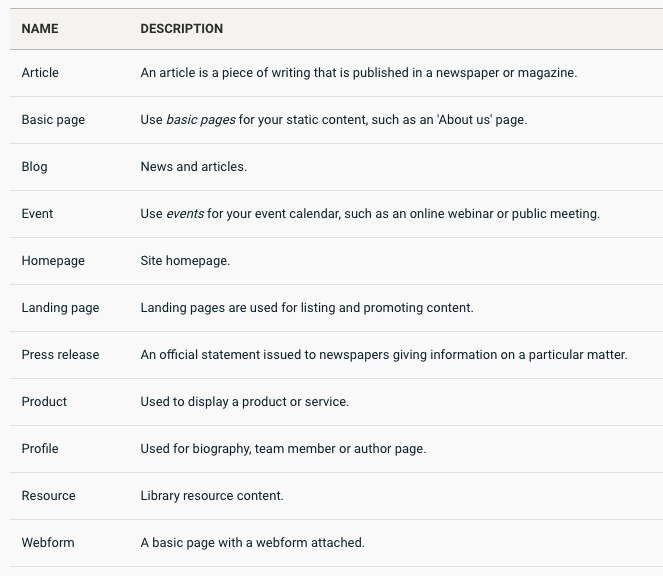
Optional content type features
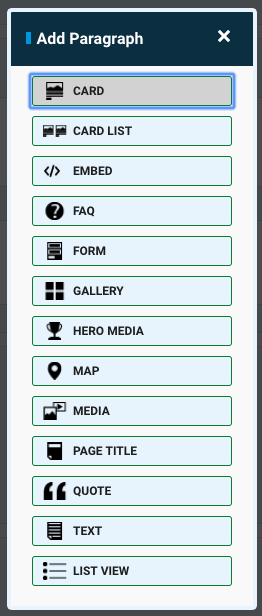
Add Paragraphs pop-up dialog
Maintenance
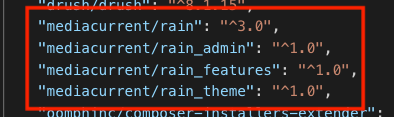
The Rain install profile takes the role of a quick starter and package manager. This is a similar approach to other distributions like Acquia Lightning. What this means is that after install, developers will own their site’s configuration and primarily leverage Rain’s Composer updates (if desired) for package dependencies. The main project Composer contains references to the base Rain distribution as well as the “Rain Features” package, both of which have their own Composer files that pull in Drupal contributed modules. The benefit of delegating this work to Rain is that modules are continually tested together as a package and include patches where needed. This can dramatically cut down on the work on the part of the “consumer” of Rain versus managing these dependencies on your own.
When updating mediacurrent/rain and mediacurrent/rain_features be sure to check the UPDATE.md file included in the main Rain project repository. This document includes instructions on how to upgrade when significant updates are made. This could include a major version change or updates after a Drupal core minor version is released. Note that Drupal core minor versions often require some refactoring, such as removing a contributed dependency that was ported to core.
Continuous Integration
Mediacurrent uses Bitbucket as our Git service of choice which means that we leverage Bitbucket’s Pipelines to execute CI tests. In our Drupal project template, we include a sample pipelines files that can be leveraged or refactored to match yml syntax for other Git repositories like Github or Gitlab.
Detaching
How married are you to Rain post-install? The answer is not too much. If you wanted to detach from Rain Composer you could easily back out the Composer dependencies, copy over what you need to your main project Composer and remove the reference to Rain’s base install profile in your custom profile’s info.yml file. From that point on, you will be managing dependencies on your own but still have the option to leverage stand-alone projects like Rain Theme or Rain Admin.
In some cases, developers will want to use the base Rain project but not the corresponding Rain Features project. The rain.install does not include any of the optional features from that project which means that you can simply remove “rain_features” from Composer in instances where you will not utilize those features.
Mediacurrent Rain projects
Local Environments
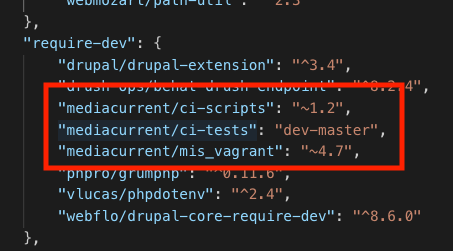
Mediacurrent currently uses a DrupalVM based local environment bundled with scripts for managing builds and deployments. These packages are included under “require-dev” in your project Composer and are not required to use Rain. If you have another environment you prefer such as Lando or DDEV you can back out these dependencies from your project Composer.
Deployments
Most Drupal web hosts (e.g Acquia, Pantheon, etc.) have their own git repository they use for deploying artifacts to the server. This includes all the actual Drupal files that make up core, contributed modules and libraries. We don’t want our source git repository to store artifacts or conform to the folder layout required by the web host. Instead, we execute deploy commands to build the artifacts from Composer and commit them to the appropriate destination git repository. To make that process easier we have some additional configuration to add to our config.yml file that instructs how and where code should be deployed.
The key aspects to both the Acquia and Pantheon configuration is pointing the release repo to the appropriate git URL provided by your host, the name of the host and the release drupal root directory. Our examples use Acquia and Pantheon but also support generic git artifact repositories like AWS.
Acquia config:
project_repo: git@pathtomysourcerepo.git
release_repo: mcABCProjectname@svn-1234.devcloud.hosting.acquia.com:mcABCProject.git
release_drupal_root: docroot
deploy_host: Acquia
Pantheon config:
project_repo: git@pathtomysourcerepo.git
release_repo: ssh://codeserver.dev.YOUR_UUID_VALUES.drush.in:2222/~/repository.git
release_drupal_root: web
deploy_host: Pantheon
Additionally, for Pantheon, you will need to add a pantheon.yml file to the root directory with the following values:
api_version: 1
web_docroot: true
php_version: 7.1 (or latest PHP version supported)
This command also needs to be run in order to clean up the Pantheon git repo prior to our first deployment:
rm -r README.txt autoload.php core example.gitignore index.php modules profiles robots.txt sites themes update.php vendor web.config
Now we are ready to build and deploy for the first time. We do this with two commands, one to build the artifacts and one to push files to the release git repository.
Example (using Pantheon):
./scripts/hobson release:build Pantheon develop
./scripts/hobson release:deploy Pantheon develop -y
After you have deployed code to Acquia or Pantheon you should be able to run a clean install using either the sample Rain child install profile (mis_profile) or cloned profile you have created (see Rain README for more details).
Final Thoughts
We hope this article helps developers get up and running smoothly with the Rain install profile and Drupal project template. At this point, you should be fairly comfortable installing Rain, creating a custom profile, exporting configuration, deploying to a Drupal host and maintaining Composer. As a package, Rain was designed to be flexible as possible to allow developers to customize their applications without being locked into a prescribed way of configuring Drupal.